
As an Amazon Associate I earn from qualifying purchases.
The Beginning of a Sweet Thing
Did you know newborns sleep 14 to 17 hours a day on average? You may have but prior to having my firstborn, I had no idea! It came as a shock to me that my baby was sleeping hour after hour. We cuddled, I did the typical household chores, I talked to her, we went on walks and took my own naps but I also found myself watching more TV during that time (I mean, how many dishes can one person reallllly wash?!). I honestly don’t even remember how I stumbled on them, but I discovered cake and cookie decorating videos on YouTube. They seemed so magical to me, how could someone make a cake that looks like a unicorn or a cookie decorated as a scene at the beach? As I watched, I told myself that I was going to try this myself someday.
Someday came when my first daughter was a few months old. She was getting into a sleep routine and I was awake for a few hours after her bedtime of around 7:00pm. I scoured Pinterest for recipes I could try and stumbled upon King Arthur Baking. I had heard of their flour, my grandma is a huge fan of their products, but I had no idea they also have a vast catalog of delicious recipes.

Ultimately, my sugar cookie and royal icing recipes did not come from King Arthur but it was an essential part of the journey that got me there. There are probably millions of sugar cookies out there, I mean there’s even a recipe for them in my mom’s family recipe box, so how do you decide on ‘the one’?! My requirements were pretty simple. I wanted zero spread, a cookie that wasn’t overly sweet, a not-too-hard not-too-soft texture. I stumbled across a recipe from Preppy Kitchen and adapted my recipe from there. I mention this in my Super Mario Toddler Party post by the way, check that article out if you’re planning a little ones Mario themed party.

My first decorated sugar cookies left a bit to be desired but I knew right away it was something I wanted to pursue and get better at. There is an actual science to the royal icing and I needed to perfect the cookies themselves. It took time, it’s a lot of trial and error, but I have my tips and tricks for you below!
The Cookies
Let’s talk about sugar cookies!
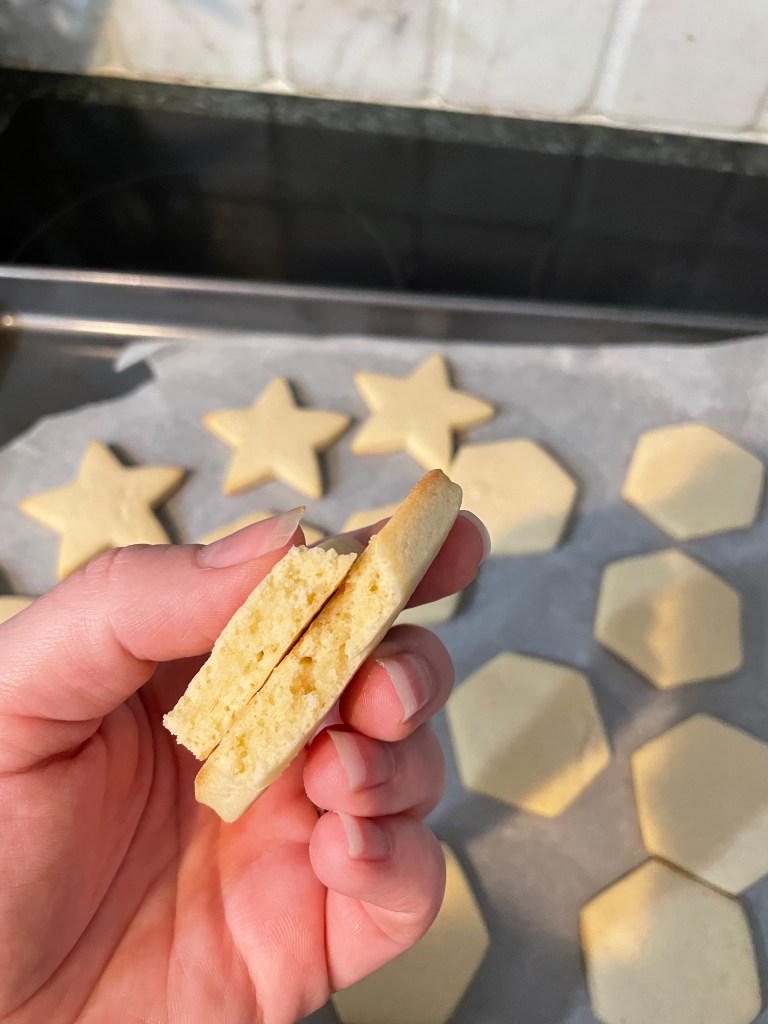
The road to finding a good sugar cookie recipe didn’t take me ,long. I hopped onto Facebook and searched for cookie groups; yes, that’s totally a thing! There were a few recipes that kept coming up over and over again, and to me that’s a great sign. I can’t remember where the first recipe I made came from, but I just didn’t love the texture so I tried the sugar cookie recipe from Preppy Kitchen. It was fantastic! No spread, just sweet enough (royal icing is super sweet so I didn’t want super sweet-on-super sweet), and they are this perfect combination of crispy and soft. I have adapted this recipe slightly to meet my needs, but only slightly so I cannot take full credit for this recipe.
So what are the ingredients needed to make sugar cookies? You’ll only need seven ingredients to make them! They are…
Flour: all-purpose flour is the kind you’ll need for this recipe. I use King Arthur but any kind will work just fine.
Sugar: they aren’t sugar cookies without the sugar! Regular white granulated sugar is what I use when I make these cookies.
Butter: unsalted butter is best so you have better control of the amount of salt being added to the cookies.
Cornstarch: to prevent spreading.
Eggs: regular chicken eggs. They’re best when room temperature, so take them out an hour or two before baking. They incorporate into the mixture better than a cold egg.
Vanilla: I typically buy a generic brand of vanilla but I’ve been wanting to make my own. When I do, I’ll follow up with a post about how it went!
Salt: table salt. Just enough to bring out the delicious flavors of these cookies.
And that’s it! I really love how straightforward this recipe is.
Sugar Cookie Recipe – Yield: about 48 cookies (more or less depending on size of cookie cutter)
- 1 cup of unsalted butter softened (227 g)
- 1 cup of granulated sugar (200 g)
- 2 large eggs
- 2 tsp vanilla extract
- 3 Tbsp + 1 tsp cornstarch (35 g)
- 1 tsp salt
Step 1. Cream together the butter and sugar. I do this on low in a stand mixer but you can use a handheld mixer as well.
Step 2. Add the eggs and vanilla to the butter/sugar. Beat on low until combined.
Step 3. In a separate bowl, combine cornstarch, salt and flour. For best results, use a sifter to add the flour.
Step 4. Add the dry ingredients to your mixing bowl of wet ingredients. Mix on low to medium being carful not to over-mix. I mix until all of the ingredients are just combined.
Step 5. Wrap dough in plastic wrap and place in the refrigerator for only 15-30 minutes.
Step 6. Preheat oven to 365 (Note: this depends on your oven. I used to bake at 375 degrees but, I had a lot of dark brown edges. It’s possible my ovens temperature gauge is off so you may need to turn your temperature up to 375.)
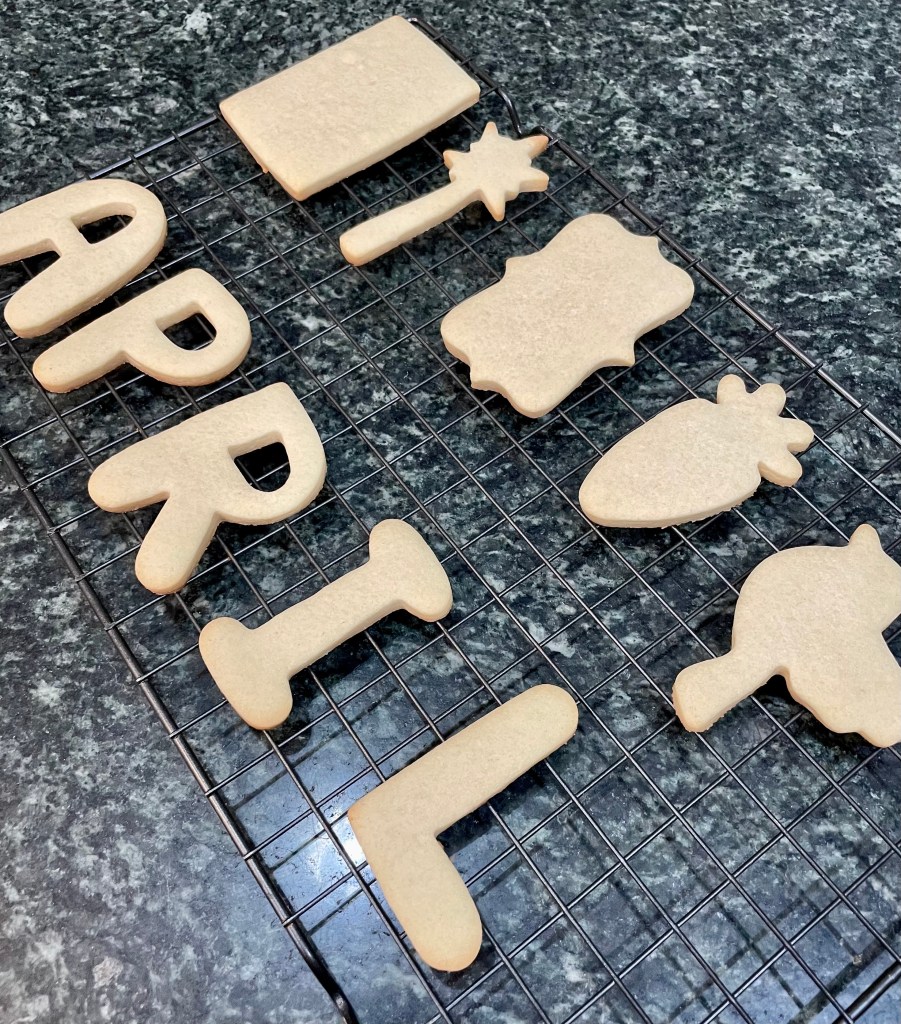
Step 7. Remove your dough from the oven and roll out on a lightly floured surface. Using your choice of cookie cutters, cut out your cookies and place them onto a pan lined with parchment paper. I use a bench scraper to pick up my cookies so I don’t squish the edges.
Step 8. Place your cookie sheet in the center of your oven and bake for 11-13 minutes. You should have light browning on the edges of your cookies but the top should be pale in color.
Step 9. Allow cookies to cool for a few minutes on your baking tray and then move to a cooling rack until completely cool.
Step 10. Decorate! See royal icing recipe below.
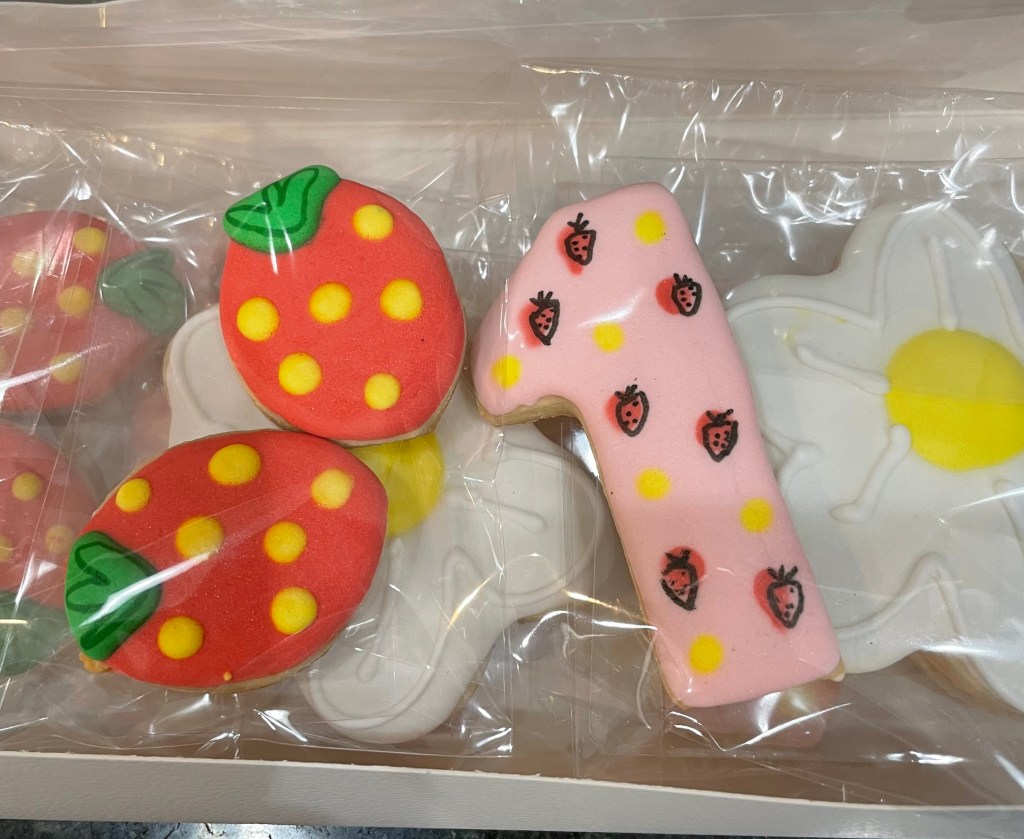
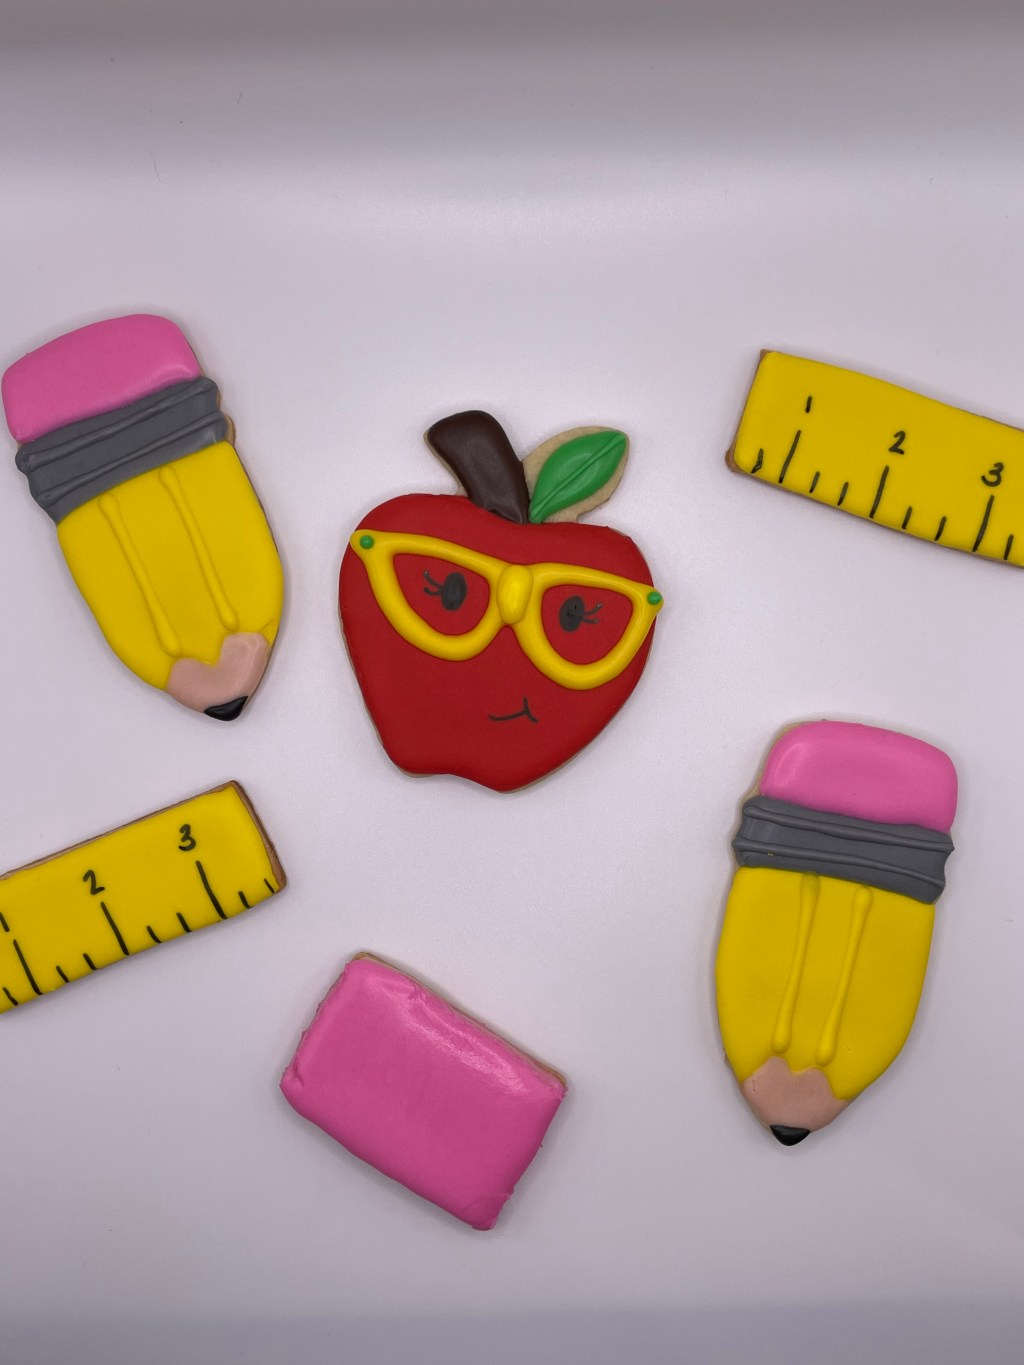
The Royal Icing
There is a real science to royal icing- literally! I didn’t know this when I first started. It tasted fine but I always had an issue with finding the right consistency. I’ve also noticed a difference in how they look. They’re visually more appealing since I’ve learned the correct way to make royal icing.
So what’s the deal? It’s honestly pretty simple but makes a big difference. The key is in the first step while making the meringue. I used to rush this step, okay actually I used to basically skip it all together. I’d just mix together the ingredients, add the amount of water to get the right consistency, and I’d get decorating. I have since learned that the meringue is what gives the royal icing it’s body and makes it stable. Without this essential step, royal icing cookies just fall a little flat so don’t rush this step!
What is needed to make royal icing? It’s also only a few ingredients…
Meringue powder mix: There are many options out there but I buy Judee’s Meringue powder mix from Amazon. I’ve always been happy with the results. It has good flavor in my opinion and it’s sturdy enough to write on it with an edible marker. It colors nicely as well.
Powdered sugar: not much to say here, just use whatever brand of powdered sugar you prefer!
Water: Water is added to the meringue powder mix and then again after the powdered sugar to get the perfect decorating consistency.
Gel food coloring: I prefer to use AmeriColor because it’s vivid and true to the color shown on each container but any gel coloring will work.

Royal Icing Recipe
- 1 cup Royal icing mix
- 3 cups Powdered sugar
- 1 cup + more water
- Gel food coloring
My recipe applies to Judee’s Meringue Powder Mix. Refer to directions on your meringue powder mix bag if you use a different brand as my measurements might not be accurate for what you choose to use.
Step 1. Combine 1 cup mix and 1 cup water in the bowl of a stand mixer fitted with the whisk attachment. Whip on medium/medium-high until you have stiff peaks (about 9-12 minutes). Be careful to not over-mix! Check for stiff peaks periodically after about 9 minutes.
Step 2. Add powdered sugar and mix until ingredients are combined.
Step 3. Add water until you have your desired consistency.
Step 4. Add your desired gel food colors, put colored icing in decorating bags and get to decorting!
Getting the desired consistency can be difficult and deserves a post of its own; so stay tuned!
Until then, stay sweet!
Liz at Feed Me Dessert
Check out my Instagram @feedmedessert_official